Tuesday, October 27, 2015

Halloween party

This year we decided to organize a Halloween party in our school. My colleagues and I worked as a team and did our best to create a pleasant atmosphere for our students. We also included the parents by inviting them to take part in some pumpking painting. All of the students and the teachers wore costumes. All of the games, activities and the photo booth were created by ourselves though we did some research on the Internet to selected the best ideas.
I hope you'll find this interesting enough and use some of it for next year's Halloween :)

1. Photo booth - Find a good picture on the Internet and use a thick cardboard to create the photo booth. Colour it and draw holes for the face. Place it in a nice corner in the classroom and you're ready to take photos.


2. Place the bow tie - You can either draw a skeleton on the board or you can make one out of cardboard so you can use it over and over again through the years. Print and cut some bow ties. Blindfold the students and ask them to pin the bow tie on a certain place on the skeleton. The person who puts the bow tie on the target place is the winner.


3. A very similar game to the previous one is with a ghost and a speech bubble saying : BOOO. Blindfold the students and ask them to put the Boo sign closest to the ghost's mouth.


4. Put the rings on the cones. For this game we bought some scary hats and used several rings. The students need to toss and put as many rings on the cones.


5. Toss and hit. You need a big cardboard box to create this. Draw and color the pumpkins and make three holes in each pumpkin with a different size. Give the students some paper balls and ask them to try and hit the holes. The biggest whole is 5 points, the second is 10, and the smallest is 15 points. Collect the points and announce the winner :)


6. Broom and pumpkin race. Make sure you have enough space in the school where you can do this game. Take two small pumpkins and two brooms. Set a starting spot and a finishing spot. Ask students to race each other by hitting the pumpkins with the brooms and rolling them to the finishing spot.


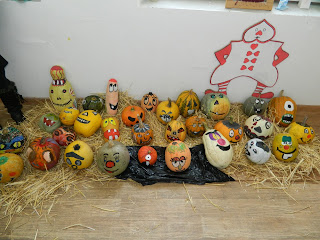
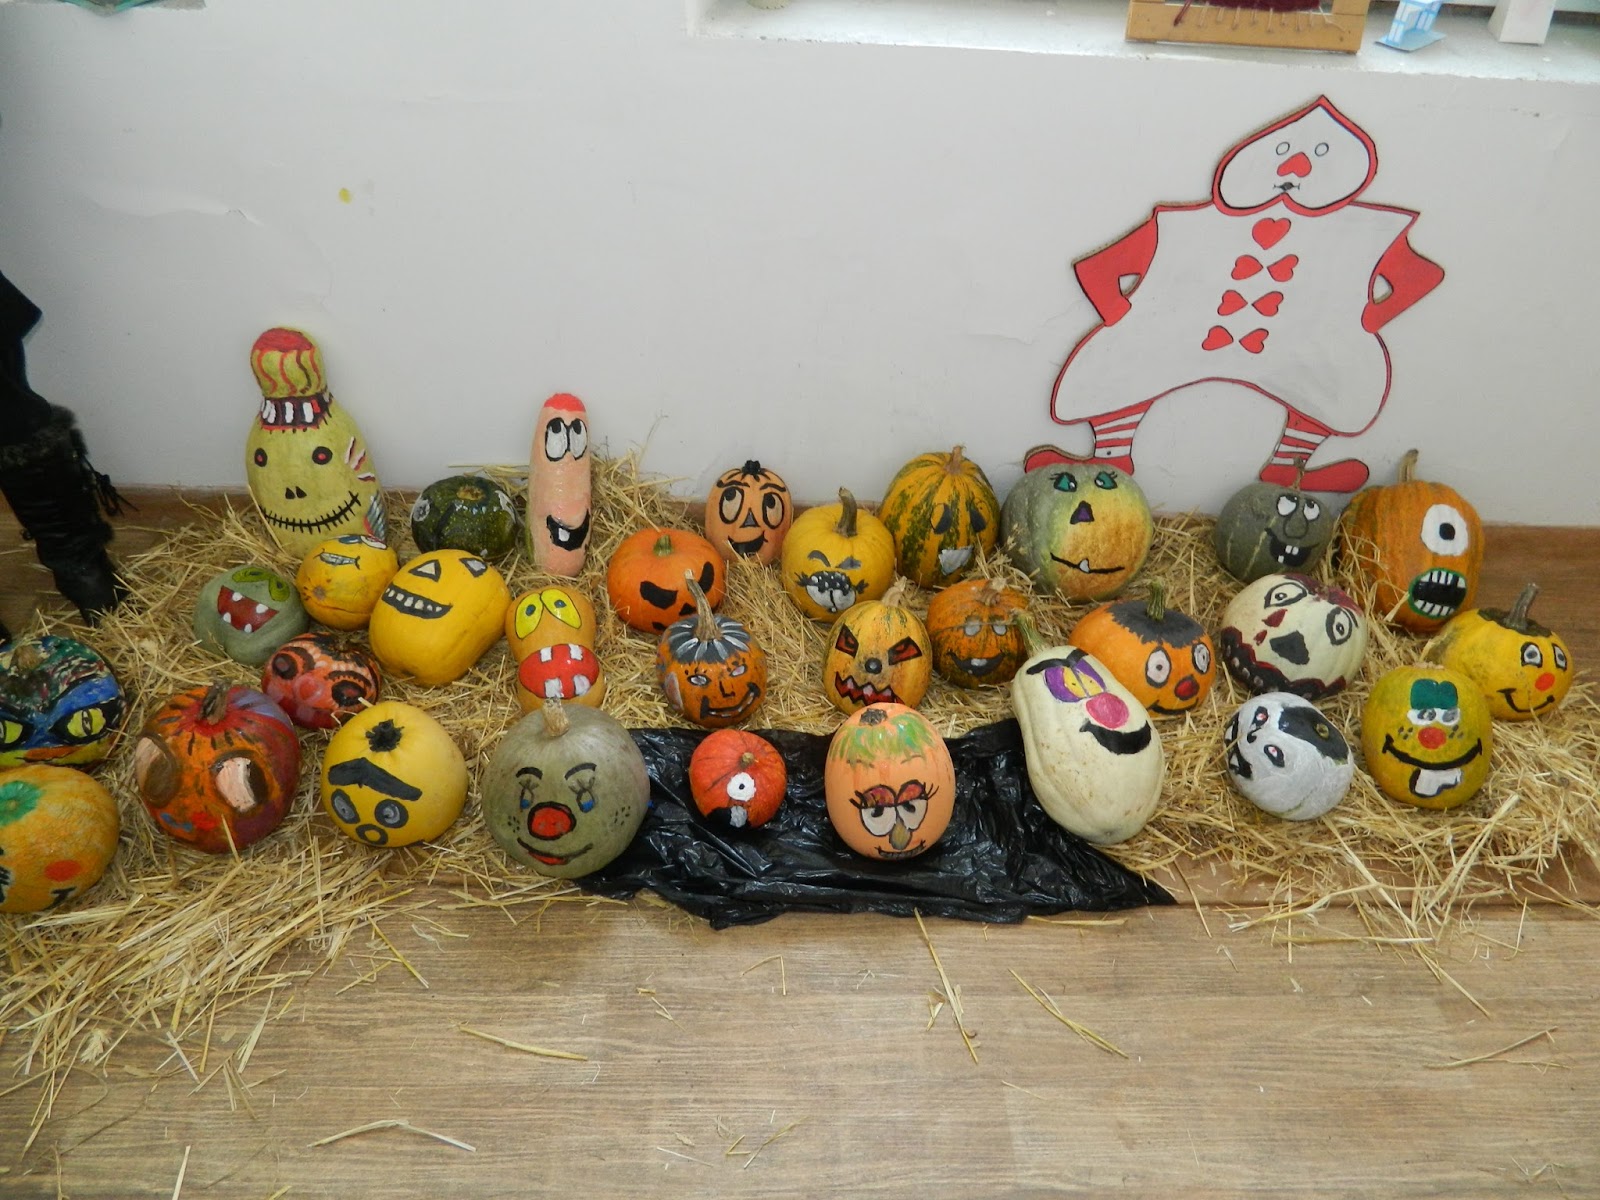
7. Pumpkin painting. Carving pumpkins can be a bit difficult and time consuming. Instead you can paint the pumpkins and still get some scary ones. This year we invited the students' parents to help us with this. After the pumpkins were done we displayed them in the hall of the school. We've really got some fine artists :)


8. Trick or treat. Halloween wouldn't be complete without a treat. My colleagues and I prepared home made cupcakes and decorated them for the occassion. Yummy.....


SEE YOU NEXT YEAR WITH SOME NEW IDEAS!


You can see more photos of the event here:

https://www.facebook.com/emiemce/media_set?set=a.10153014658096853.1073741879.603176852&type=3&pnref=story


Sunday, April 26, 2015

Introduction of new vocabulary - Body parts - fourth grade

This is just an idea on how a lesson on introducing body parts can be organized.

Warm - up : Start the lesson by showing some flash cards of body parts to the students. Try to elicit the words from the students and present the new ones by asking them to repeat after you several times. Put the pictures on a wall in the classroom, point to each picture in the order they are arranged and ask students to name the picture. Help them when necessary.
To practice the pronunciation of the words further you can ask students to repeat the word according to its position. For example if the picture "eyes" is on the first place in the line they are going to say the word only once. If for example the picture "shoulders" is fifth in the row then they should say the word five times, and so on. After you have practiced the words enough you can point to the pictures in a mixed order and ask students to name them.


- You can make your own flash cards by simply printing out some coloring pages, color them, use a marker to write the words and you are ready to go :)

Main part: Ask the students to copy the words from the pictures in their notebooks and write down their meaning.
Then put a poster on the board. Make sure to prepare some paper puppets, cut them in separate pieces, distribute the pieces to the students and ask them to come to the board to put the pieces together and solve the puzzle. While putting the pieces together they should name the parts of the body.


Once they have the paper puppets together, give the students cards with the parts of the body. Ask them to come up to the board and put the word next to the correct part of the body.


It's easy as one, two, three and you have your own interactive poster. You can put it on the wall and use it again when you need to revise the parts of the body, or simply students can refer to it when they have a difficulty remembering some of the vocabulary.

End of class activity: It is always important to end the lesson in a  positive note. That's why we prepared a game and a song to wrap things up. It takes some preparation on part of the teacher for the next game, but also you can ask students to make their own cards. Make cards for every student of the body parts you want to include in the game. Give each student one cards and ask them to put the cards on the desk in front of them. I laminated mine and I have used them for several years now.
The game is as follows: The teacher says the words in a quick manner and the students need to show that card. The students who make a mistake are out of the game and you choose a winner in the end- the person who made the least mistakes.
After this you can play the game Simon says, by telling students: Touch your knees, touch your toes....Touch your friend's nose.


https://www.youtube.com/watch?v=eWsD26om-e4


Finally, play a song for the students. I used a song from the book Let's go, let's begin. Ask students to come to the board in pairs. Make them stand next to each other without looking at each other. They should listen to the song and touch the part of the body they listen. It's a fun way to practice the words and students enjoy when you turn the activity into a competition. At least my students enjoy it. The person who doesn't make a mistake is the winner:)


Friday, April 24, 2015

Paper pockets - plural of nouns

We made some paper pockets and put them on a wall in the classroom. We decided to use them to learn and revise plural of nouns. Give each students some pieces of paper with nouns that form both regular and irregular plural. Ask them to put the noun in the correct pocket and say its plural form. Pay attention on the spelling rules and pronunciation rules that arise when forming the plural forms of the nouns.


You can call these vocabulary banks. The idea is that you add words in the pockets from time to time. It is a good thing that they are displayed in the classroom and students can use them when they are not sure about the plural of some nouns. Also, you can enrich the collection in each group by adding new words every now and then. You can also do this with verbs in different tenses or vocabulary categories, positive and negative adjectives etc.


Thursday, April 16, 2015

Jobs vocabulary - revision

Start the lesson by showing some flash cards with jobs. To make it more amusing you can use a book to hide the picture then quickly just show the card and hide it again and let students try to guess the words.


Then for the next activity ask students to stand in a circle and make sure there is enough space in the middle. Tell them that they are going to listen to a song. Give them pieces of papers with the lyrics of the song and ask them to arrange the song on the floor according to what they hear. Here is a link to the song I used:
The teacher needs to make the pieces of paper with the words from the song before the lesson, it takes some time but you can use the same pieces of paper with other classes too.


You can play the song as many times as you think it is necessary. Ask students to sing the song along with you and read the lyrics from the cards on the floor. Additionally you can do the activities from the site connected to the song.
Or, you can play a video to the students and ask them to write down all the professions they see in the video. This video was used in our lesson, and only the first 44 seconds of it until they start showing the words for each job.
After they watch the video you can check the words and ask them to make definitions for each job.

To make sure they know all of the words you can prepare a poster with sentences / definitions that refer to each profession and give the students cards with the names of the jobs. Ask students to come to the board and put the words next to the correct sentence.